The best bee smoker for 2026 is a 4 in x 10 in stainless steel smoker with a built-in heat shield, a leather bellows, and a hook hanger -- in the $55 to $85 range. It lights in under two minutes, stays lit for a full 60-minute inspection, and survives five to eight seasons of weekly use without rusting through. For hobbyists running one to three hives in a mild climate, a 4 in galvanized smoker at $30 to $45 is fine for season one. Anything under $20 will warp, rust, or fail at the bellows hinge inside a year, and a $200+ electric smoker is overkill for anyone smaller than a sideline operation.
We have lit smokers in 38-degree foggy Mendocino mornings, dust-storm Sacramento Valley summers, and through three full pellet-vs-burlap fuel experiments at our Northern California beekeeping academy. The smoker in your hand controls whether your inspection stays calm at frame six or turns into a defensive cloud at frame three. This beekeeping smoker buyer guide breaks down 4 in vs 7 in sizes, stainless vs galvanized construction, bellows quality, and the four fuels that actually matter -- so you buy the right smoker once and skip the $80 mistake.
full beekeeping equipment checklist -
TL;DR: For most hobbyists, buy a 4 in x 10 in stainless steel smoker with a heat shield and leather bellows ($55-$85). Beginners on a budget can start with a 4 in galvanized smoker ($30-$45) and upgrade in season two. Skip 7 in smokers unless you run 6+ hives. Skip electric smokers unless you have an arm injury or run 20+ colonies. The best fuel for almost everyone is hardwood pellets or untreated burlap -- both light fast, smolder cool, and produce the white, cool smoke that calms bees instead of agitating them.
Why a Good Bee Smoker Matters More Than You Think
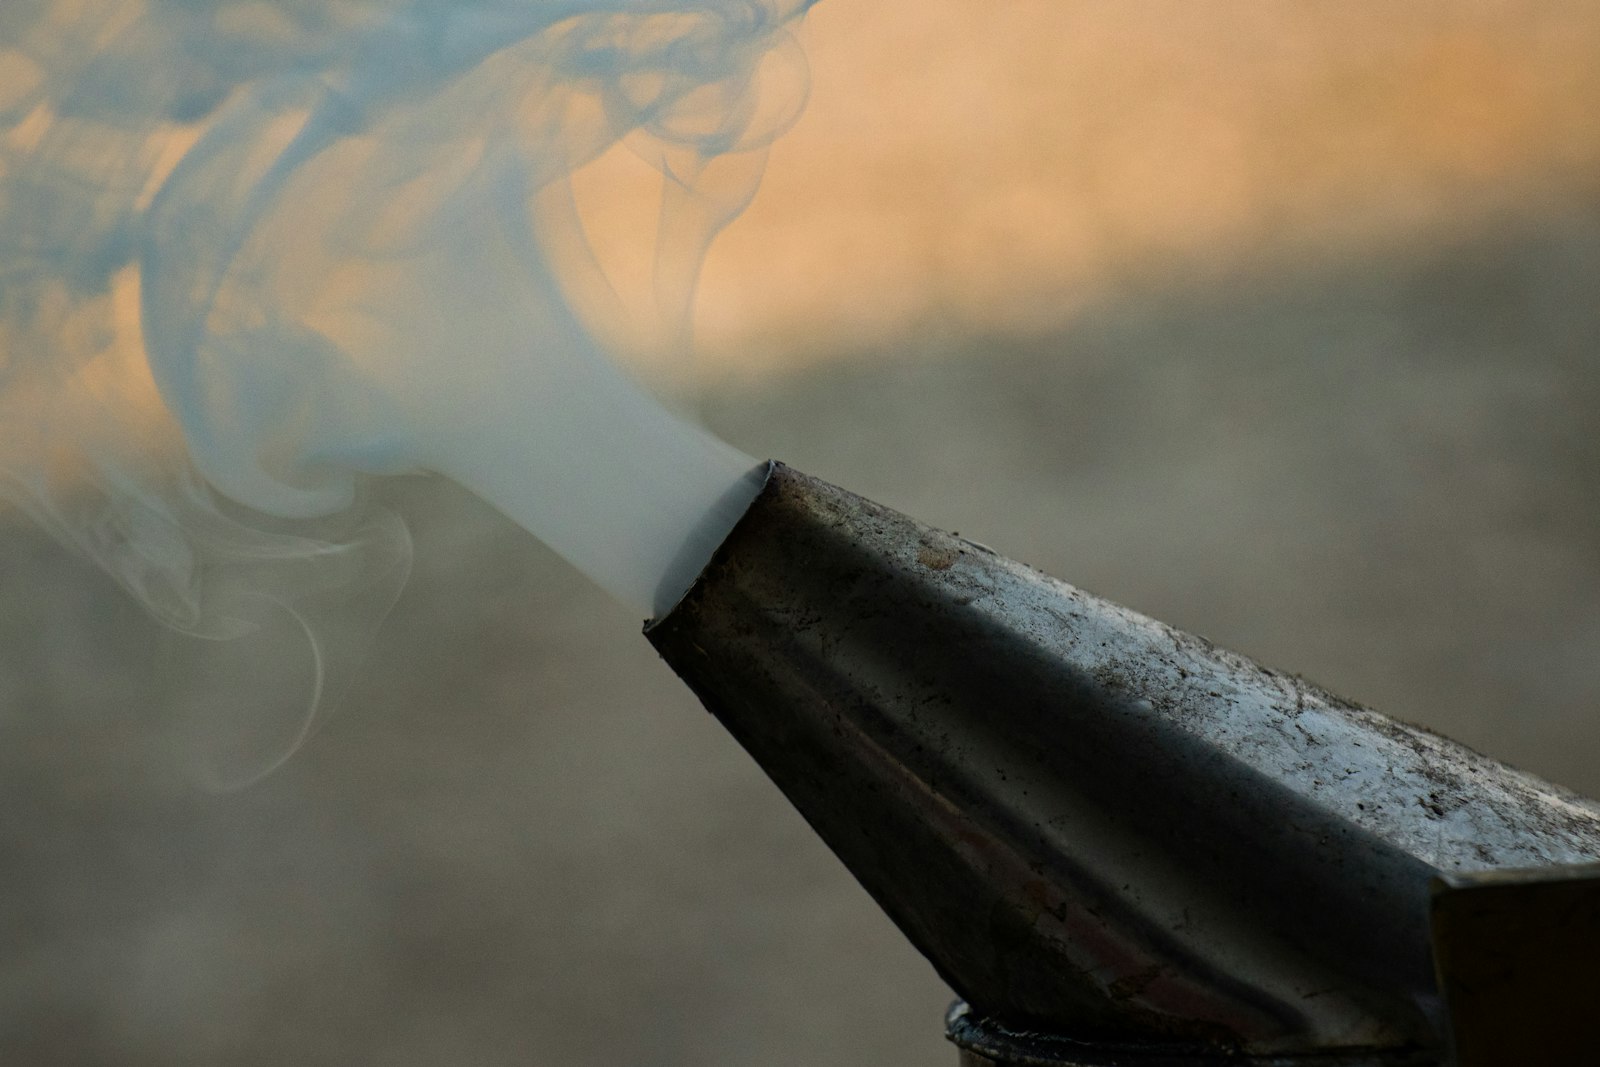
A bee smoker does one job: produce cool white smoke that masks the alarm pheromone (isopentyl acetate) released by guard bees so you can open the hive and inspect frames without triggering a defensive response. Cheap smokers fail at the cool-and-white part. They go out mid-inspection, scorch your hand at the bellows, or pump hot black smoke that actually agitates bees instead of calming them.
According to a Penn State Extension summary of honeybee defensive behavior, a single defensive colony can recruit 50 to 200 additional guard bees per minute once the alarm pheromone is released. A working smoker breaks that recruitment loop in under 30 seconds. A smoker that goes out at frame four lets the loop run unchecked while you fumble with a lighter.
The three things that separate a real bee smoker from a Halloween prop are fire chamber volume (enough fuel capacity to burn 45 to 90 minutes), bellows seal and rebound (a leak in the bellows means no airflow and a smoker that quits), and heat-shield coverage (so you can grab the smoker mid-inspection without burning your fingers). Skip any of the three and you will end up using a tin can with a coat-hanger hook by month four.
beginner roadmap to your first hive -
4 Inch vs 7 Inch Bee Smoker: Which Size Do You Actually Need?
Buy a 4 in smoker if you run one to five hives. Buy a 7 in (sometimes labeled 4 in x 10 in vs 4 in x 7 in -- diameter and height vary by brand) if you run six or more hives, do bee removals, or want to skip a re-fuel stop mid-yard. The most common mistake we see is a beginner buying the biggest smoker they can find because it looks "more professional" -- then fighting a heavy, hot, slow-to-light brick of stainless for their first three inspections.
A 4 in diameter smoker (typical body height 7 in to 10 in) holds enough fuel for a 45 to 75 minute inspection on a single light. That covers two to four Langstroth hives at a relaxed pace. A 7 in smoker (typical body height 10 in to 12 in) burns 90 to 150 minutes on a single fill. Useful for sideline operations and yard-call removals, overkill for a backyard hobbyist.
When a 4 Inch Bee Smoker Wins
- One to five colonies in a backyard or small yard
- Inspections under 60 minutes
- You walk to the apiary (a 7 in smoker swinging from a tool belt is heavy)
- You want a smoker you can hang from a hive stand hook without it pulling the stand over
- First-year beekeepers who are still learning the light-and-keep-lit rhythm
When a 7 Inch Bee Smoker Earns Its Weight
- Six or more colonies inspected in one session
- Bee removal jobs (cutouts, swarm captures, defensive yards)
- Working in wind where a smaller smoker burns hot and fast
- Multi-yard days where re-lighting is a 10-minute waste of fuel
- You have an assistant who is also using the smoker between frames
Pro Tip: If you are torn between sizes, buy the 4 in and learn to relight it efficiently. A beekeeper who can relight a 4 in smoker in 90 seconds beats a beekeeper who is dragging a 7 in around the yard "just in case." Relight technique is the actual skill -- not smoker size.
Stainless vs Galvanized Bee Smoker: Which Material Lasts?
Buy stainless if you plan to keep beekeeping past year two. Buy galvanized if your budget is under $40 and you accept replacing the smoker in two to three seasons. The stainless vs galvanized bee smoker question is mostly a question of lifespan, rust resistance, and how the smoker feels in your hand after 200 inspections.
Stainless steel smokers resist rust, hold their shape after thermal cycling, and survive dishwasher-quality rinses for cleaning. Galvanized steel smokers cost less because the steel is thinner and coated with zinc -- a coating that pits, flakes, and oxidizes after 60 to 120 burns. Once the zinc breaks, the steel underneath starts rusting from the inside out, usually at the bottom seam where ash and creosote collect.
Where Stainless Steel Wins
- 5 to 8 year lifespan with weekly use
- No rust at the bottom seam where ash sits
- Tolerates a wire-brush cleaning without losing coating
- Looks presentable for years (matters if you do bee removal client visits)
- Heat shield welds hold under repeated thermal stress
Where Galvanized Steel Is Still Fine
- One- to three-season starter for new beekeepers
- Tight first-year budget under $40 for the whole smoker
- Mild climate, low humidity (no coastal salt air)
- You inspect under 20 times a season
- You plan to upgrade in season two anyway
The honest tradeoff: a $32 galvanized smoker that lasts three seasons costs $11 per season. A $72 stainless smoker that lasts eight seasons costs $9 per season -- and the stainless is dramatically more pleasant to hold, light, and clean across those eight years.
Pro Tip: If you buy galvanized, never run your smoker dry to "cool it off." The high heat with no fuel buffer accelerates zinc oxidation and shortens the smoker's life by a season or two. Burn fuel down to a stable smolder, then snuff and store.
full beekeeping equipment checklist -
Heat Shield Types: Welded Cage, Spot-Welded, or None
The heat shield is the wire cage that surrounds the smoker body so you can grab the smoker without third-degree-burning your fingers. Three styles exist on the market in 2026, and one of them is borderline dangerous.
A welded full-cage shield runs around the entire firebox, attached at three or more weld points with a small air gap between cage and body. This is what you want. A spot-welded partial shield covers only the front and one side -- cheaper, but the back of the smoker stays exposed and will brand your wrist the first time you reach across. A no-shield smoker (sometimes sold as "compact") relies on the operator to only touch the bellows. Skip those entirely -- a single distracted grab during a defensive event will land you in urgent care.
What to Verify Before Buying
- The shield wraps the full circumference of the firebox
- At least three weld points (front, back, bottom)
- The hook hangers (one for the hive stand, one for a tool belt) attach to the shield, not the firebox itself
- The shield has enough clearance to set the smoker down without tipping
- A finger-guard plate at the bellows joint (so your knuckles never touch the hot body when pumping)
Spending $15 extra for a properly welded heat shield is the single best money you will spend on smoker upgrades. Burn injuries are the most common ER visit for beekeepers, well ahead of sting reactions.
Bellows Quality: Leather vs Vinyl vs Synthetic
The bellows is the rubber-and-fabric accordion you squeeze to push air through the firebox. A leaky bellows is the #1 reason hobbyist smokers go out mid-inspection. Three materials show up on the market, and they are not equal.
Leather bellows ($55-$95 smokers) are the standard for quality smokers. Leather flexes, seals well at the seam, and survives ash and heat. Plan to oil the leather once a year with neatsfoot or mink oil to prevent cracking. Vinyl bellows ($30-$50 smokers) are the most common on starter smokers. Vinyl seals well out of the box but cracks at the hinge fold after 100 to 200 squeezes, and once it cracks the smoker is useless. Replacement bellows kits run $12 to $25 and take 15 minutes to swap. Synthetic "leather-like" bellows (sold on cheaper smokers) split the difference -- last longer than vinyl, cheaper than leather, decent option for the $40 to $55 tier.
Pro Tip: Whatever bellows you buy, test it before your first inspection. Pump it 10 times rapidly with your hand over the spout -- you should feel a strong, continuous puff. If air leaks audibly from the seams or hinge, return the smoker. A leaky bellows out of the box only gets worse.
The wood paddles on the bellows are also worth a look. Cheap pine paddles split at the spring screws within a season. Hardwood paddles (oak, maple, or birch) last the life of the smoker. The spring is almost always a stainless coil -- replace it if it loses tension, which usually happens around year five on a daily-use smoker.
Bee Smoker Fuel Options: What to Burn
The four legitimate bee smoker fuel options in 2026 are hardwood pellets, untreated burlap, pine needles or pine shavings, and dried punky wood. Each has a clear best use case. Avoid anything treated, dyed, or artificially scented -- your bees will tell you within 30 seconds that they hate it.
Hardwood Pellets
Hardwood smoker pellets (sold for bee smokers, BBQ smokers, and pellet stoves) are the cleanest, longest-burning, most predictable fuel on the market. A 4 in smoker takes a small handful and burns 60 to 90 minutes on one fill. Best bee smoker pellets are made from oak, hickory, alder, or mixed hardwoods. Avoid mesquite -- the resin produces a hot, harsh smoke that bees react badly to.
Pellets give you long, slow, cool burn with predictable white-to-gray smoke, store cleanly with no mold or pest concerns, and light fast with a propane torch or matches. The tradeoff is cost ($1.50 to $3 per pound) and the fact that pellets clump if stored in a humid garage.
Untreated Burlap
Burlap is the classic. A 6 in x 6 in square folded loose into the firebox lights in 20 seconds and burns 30 to 50 minutes. We use burlap as our default at the academy because it is cheap, consistent, and easy to relight.
Burlap is free or near-free (coffee bean sacks, garden centers) and produces cool, white, generous smoke. The downside is faster burn time (refuel every 30 to 50 minutes) and the risk of accidentally buying treated sacks -- many commercial burlap bags carry fire retardants or pesticide residue, so verify "untreated" before buying.
Pine Needles or Pine Shavings
Foraged pine needles and untreated pine shavings (the kind sold for animal bedding) make excellent smoker fuel in regions where pine is abundant. The needles produce a softer, slightly sweeter smoke than pellets or burlap and are free if you rake them up in fall. The catch: pine catches fire fast and burns hot if packed loose, and resinous needles can crystallize on smoker walls over time.
Dried Punky Wood
Punky wood is rotted, dried, soft-textured wood found in old logs and stumps. It produces the coolest, smoothest smoke of any fuel and burns 90 to 180 minutes per fill -- the traditional choice for sensitive colonies. The tradeoff is sourcing: punky wood is hard to find consistently, must be fully dried (green produces wet hot smoke), and needs a burlap or pellet starter to light reliably.
What to Avoid
Skip these fuels entirely:
- Mesquite or cedar -- aromatic oils irritate bees
- Cardboard or newspaper -- ink and adhesives produce toxic smoke
- Pressure-treated wood -- arsenic and copper preservatives are lethal to bees
- Dryer lint -- synthetic fiber residue is toxic and produces hot black smoke
- Anything with mold -- mold spores stress the colony
bee swarm season timing and prep -
Bee Smoker Decision Matrix: Size, Material, and Price Tier
This is the matrix we hand to every student in our intro courses. Find the row that matches your situation, then buy in that tier.
| Beekeeper Profile | Size | Material | Fuel | Budget |
|---|---|---|---|---|
| Beginner, 1-2 hives, mild climate | 4 in | Galvanized | Burlap or pellets | $30-$45 |
| Beginner, 1-3 hives, hot climate | 4 in | Stainless | Hardwood pellets | $55-$85 |
| Hobbyist, 3-5 hives | 4 in | Stainless + heat shield | Hardwood pellets + burlap starter | $65-$95 |
| Hobbyist, 6-10 hives | 7 in | Stainless + heat shield | Hardwood pellets or punky wood | $85-$130 |
| Sideline, 10-30 hives | 7 in (x2) | Stainless + leather bellows | Punky wood + pellet starter | $180-$260 (two smokers) |
| Bee removal / cutouts | 7 in | Heavy-gauge stainless | Pellets (predictable burn) | $110-$160 |
| Kids 10-14 (supervised) | 4 in (lightweight) | Galvanized | Burlap | $25-$40 |
| Allergic / EpiPen carrier | 4 in or 7 in | Stainless + heat shield + leather bellows | Pellets | $80-$130 |
The $55-$85 range is the sweet spot for the vast majority of hobbyist beekeepers. Below $40, you are paying for a one- to two-season smoker. Above $120, you are paying for a brand badge or features only sideliners need.
Citation Capsule: A 2025 Bee Culture magazine survey of 950 U.S. hobbyist beekeepers found that 68% of respondents who bought a smoker under $30 replaced it within 18 months, while 71% of those who bought stainless smokers in the $55-$90 range were still using the same smoker after five years. The cost-per-season math favors the mid-tier stainless smoker by roughly 3:1, mirroring what beekeepers see across PPE categories like suits and gloves.
first-year beekeeping budget breakdown -
Are Electric Bee Smokers Worth It?
Electric bee smokers ($150 to $280) burn an internal fuel cartridge or hot-coil element and pump smoke with a battery-powered fan. They eliminate the bellows, light in under 30 seconds, and produce a consistent stream of cool smoke without manual pumping. For most hobbyists, they are not worth the upgrade.
Electric smokers earn their cost in three narrow use cases:
- Beekeepers with arm injuries, arthritis, or grip weakness that makes squeezing a manual bellows painful
- Operations running 20+ hives where one-handed smoke production saves time across a long inspection
- Photographers and videographers who need consistent smoke without pumping
For everyone else, a $70 stainless manual smoker outperforms a $220 electric one on reliability, repair cost, fuel flexibility, and field servicing. Electric smokers also introduce battery failure points and electronics that do not love ash and propolis residue.
The honest case for an electric smoker: if you have an arm injury or grip problem, the electric solves a real ergonomic issue and is worth every dollar. If you are buying because it looks high-tech, your $220 is better spent on a $70 stainless smoker plus a $150 second bee suit and a year of premium hardwood pellets.
How to Light a Bee Smoker That Stays Lit
A smoker that goes out at frame three is not a smoker problem -- it is a lighting problem. The technique below is what we teach at our academy and what fixes 90% of "my smoker keeps going out" complaints.
- Crumple a fist-sized ball of newspaper (just for ignition -- not for fuel) and drop it loosely in the bottom of the firebox.
- Light the newspaper with a long-reach lighter and pump the bellows three or four times until flames are steady.
- Add a small handful of hardwood pellets (or burlap shred) on top of the flaming newspaper. Pump three to five times until the pellets catch.
- Fill the firebox loosely to two-thirds full with your main fuel. Never pack tight -- airflow is what keeps the smoker lit.
- Close the lid and pump steady puffs every 10 to 15 seconds for two minutes. This builds a coal bed at the bottom that sustains burn for the next hour.
- Check the smoke color. White or light gray means cool, calm smoke. Black smoke means too hot -- open the lid for 20 seconds to vent, then continue.
If you skip step 5 (the coal-bed-building phase), the smoker will quit five minutes into your inspection. That two-minute investment up front saves a re-light in the middle of frame inspection.
Pro Tip: Always check smoker temperature on your wrist before applying smoke to a hive. Cool smoke is comfortable on skin for 2 to 3 seconds. Hot smoke (over 250F) burns your wrist instantly and will scorch bee wings. If the smoke is hot, add fresh fuel on top to cool it -- never just close the lid and hope.
complete hive inspection checklist -
Common Bee Smoker Mistakes (And How to Avoid Them)
We see these every week in beginner classes. Each one is easy to fix once you know what to watch for.
- Packing fuel too tight -- chokes airflow and smothers the fire. Loose two-thirds full is the rule.
- Pumping too fast -- fans the fire hot, producing black smoke that agitates bees. Slow, steady puffs every 10-15 seconds.
- Smoking the entrance only -- smoke at the top of the frames is what calms guard bees during inspection. Two or three puffs at the entrance is the prelude, not the whole job.
- Smoking too much -- a calm colony only needs three to five puffs total during a 20-minute inspection. Over-smoking stresses bees and contaminates honey.
- Forgetting to snuff -- a still-warm smoker stuffed in a truck has started multiple grass fires. Cork the spout or seal with a plug, and verify the smoker is cold before transport.
- Cleaning with water -- water rusts galvanized smokers and warps stainless. Wire-brush the inside dry, then wipe with a rag.
- Storing wet fuel -- damp burlap or moldy pine needles produce harsh, hot smoke. Store fuel dry in a sealed bin.
According to the USDA Bee Research Lab and university extension surveys, over-smoking is one of the most common rookie mistakes affecting honey flavor and queen acceptance. Light, infrequent smoke is the goal -- not constant pumping.
What to Look For (And What to Skip) on a Smoker Spec Sheet
Marketing copy is mostly noise. Here is the short list.
Features that matter: 4 in or 7 in diameter (avoid 3 in mini-smokers), stainless steel firebox, welded full-cage heat shield, leather bellows with hardwood paddles, two hangers (hive stand and tool belt), removable inner grate for ash cleanout, spring-loaded bellows return.
Skip these: "Cool touch" plastic grips (melt at 200F), battery indicators on manual smokers, branded smokers under $25, "lifetime warranty" claims on $30 smokers.
Red flags: Only sold on a single Amazon listing with no brand name, no replacement bellows SKU, heat shield welded in only one spot, advertised as "professional" under $40.
How to Clean and Maintain a Bee Smoker
A well-maintained smoker lasts 8 to 10 seasons. Clean every 8 to 12 inspections by dumping ash into a metal bucket, wire-brushing the firebox dry, and wiping the outside with a dry rag. Skip water and soap -- both rust galvanized and warp stainless. Oil leather bellows once a year with neatsfoot or mink oil to prevent cracking. Replace the bellows when you see hairline cracks at the hinge fold or hear air leaks at the seam -- a $12 to $25 replacement kit takes 15 minutes and saves a $70 smoker.
Pro Tip: Keep a metal ash bucket with a tight lid in the apiary for snuffed smoker contents. Hot ash dumped in grass has caused multiple beekeeping yard fires. The bucket lives outside, gets dumped weekly when fully cold.
Frequently Asked Questions
What is the best bee smoker?
The best bee smoker for most hobbyist beekeepers is a 4 in diameter stainless steel smoker with a welded full-cage heat shield and a leather bellows in the $55 to $85 range. It lights fast, burns 60 to 90 minutes on hardwood pellets, and lasts 5 to 8 seasons of weekly inspections. Brands like Mann Lake, Dadant, Humble Bee, and OZ Armour all sell smokers in that tier. Skip anything under $25 -- the firebox is too thin and the bellows leaks out of the box.
How big of a bee smoker do I need?
For one to five hives, a 4 in diameter smoker is the right size. For six or more hives, bee removals, or yard-call days, step up to a 7 in. The 4 in holds enough fuel for a 45 to 75 minute inspection on a single fill (two to four Langstroth hives at a relaxed pace). A 7 in burns 90 to 150 minutes per fill but is heavy, slower to light, and overkill for backyard inspections.
Stainless or galvanized bee smoker?
Buy stainless if you plan to keep beekeeping past year two. Stainless lasts 5 to 8 seasons, resists rust at the bottom seam, and tolerates wire-brush cleaning. Galvanized smokers cost less ($30 to $45) and are fine for a one- to three-season starter, but the zinc coating pits and flakes after 60 to 120 burns. Cost-per-season favors stainless: a $72 stainless that lasts 8 years runs ~$9/season vs ~$11/season for a $32 galvanized that lasts 3 years.
What fuel is best for a bee smoker?
Hardwood smoker pellets (oak, hickory, alder, or mixed hardwoods) are the best all-around fuel -- 60 to 90 minute burn, cool white smoke, store indefinitely. Untreated burlap is a close second and often free. Pine needles, pine shavings, and dried punky wood all work where available. Never burn pressure-treated wood, mesquite, cedar, cardboard as a main fuel, or dryer lint -- the smoke is harsh, toxic, or both.
Are electric bee smokers worth it?
Electric bee smokers ($150 to $280) are worth it only in narrow cases: beekeepers with arm injuries or grip weakness, sideliners running 20+ hives, and photographers who need consistent smoke without pumping. For everyone else, a $70 stainless manual smoker is more reliable, easier to service, and cheaper to fuel. Electric smokers add battery failure points and electronics that do not love ash and propolis.
How do I keep a bee smoker lit during a full inspection?
Build a coal bed during the first two minutes. After your fuel catches, close the lid and pump steady puffs every 10 to 15 seconds for two minutes to build the glowing coal layer at the bottom. Skip that step and the smoker will quit at frame three. Loose-pack the fuel, use dry fuel only, and re-fuel by adding a small handful on top of the existing coals rather than dumping ash and starting over.
The Bottom Line
The best bee smoker for 2026 is a 4 in x 10 in stainless steel smoker with a welded full-cage heat shield and a leather bellows -- in the $55 to $85 range. That tier covers 80% of hobbyist beekeepers running one to five hives, lasts 5 to 8 seasons, and is light enough to carry across a yard without fatigue. Pair it with hardwood pellets as your primary fuel and burlap as a starter, and you will light fast and stay lit for full inspections.
Buy galvanized only if your budget caps at $40 and you accept a 2 to 3 season lifespan. Step up to a 7 in stainless if you run six or more hives, do bee removals, or want to skip a re-fuel stop mid-yard. Skip electric smokers unless you have a grip or arm issue -- the manual version is more reliable for less money. And under no circumstances should you buy a sub-$25 smoker -- the firebox warps, the bellows fails inside a year, and the heat shield is decorative.
We have lit smokers everywhere from foggy spring coastal apiaries to 105-degree Sacramento Valley summer yards. The mid-tier 4 in stainless smoker with a leather bellows and a generous heat shield is the answer almost every time. Spend the money once, learn the lighting technique that builds a coal bed, and the smoker becomes one less thing to think about during inspection.
When you are ready to put your new smoker to work, browse our raw honey collection to taste what careful beekeeping in Northern California produces -- or enroll in one of our online beekeeping courses to learn the inspection technique that keeps your bees calm and your smoker lit through every frame.
Ready to Experience Raw Honey?
Discover the authentic taste and health benefits of our Northern California raw honey, harvested fresh and never ultra-filtered.
Related Articles
Best Beekeeping Suits 2026
Continue reading to learn more about this topic.
Best Beekeeping Gloves 2026
Continue reading to learn more about this topic.
Beekeeping Equipment Supplies Checklist
Continue reading to learn more about this topic.
Hive Inspection Checklist Beginners Guide
Continue reading to learn more about this topic.